Sync Design Changes
Sync design changes helps you to avoid switching back to Figma designs repeatedly and creating a new app in DhiWise again to bring all your new design changes. It helps to save a lot of time in a single click and helps you get your modified design right here all the way from the Figma file. No need to switch to the design file for it, we have covered all right here.
Sync design changes doesn't work with templates.
How to sync design changes from Figma file?
Step 1:
In your created application, for a screen inside the Smart Editor, open the screen list from which you will find refresh 🔄️ icon, on the top right OR Sync design changes button below the Build button.
As you click on that icon or button, sync design changes process will start as shown below.
Step 2:
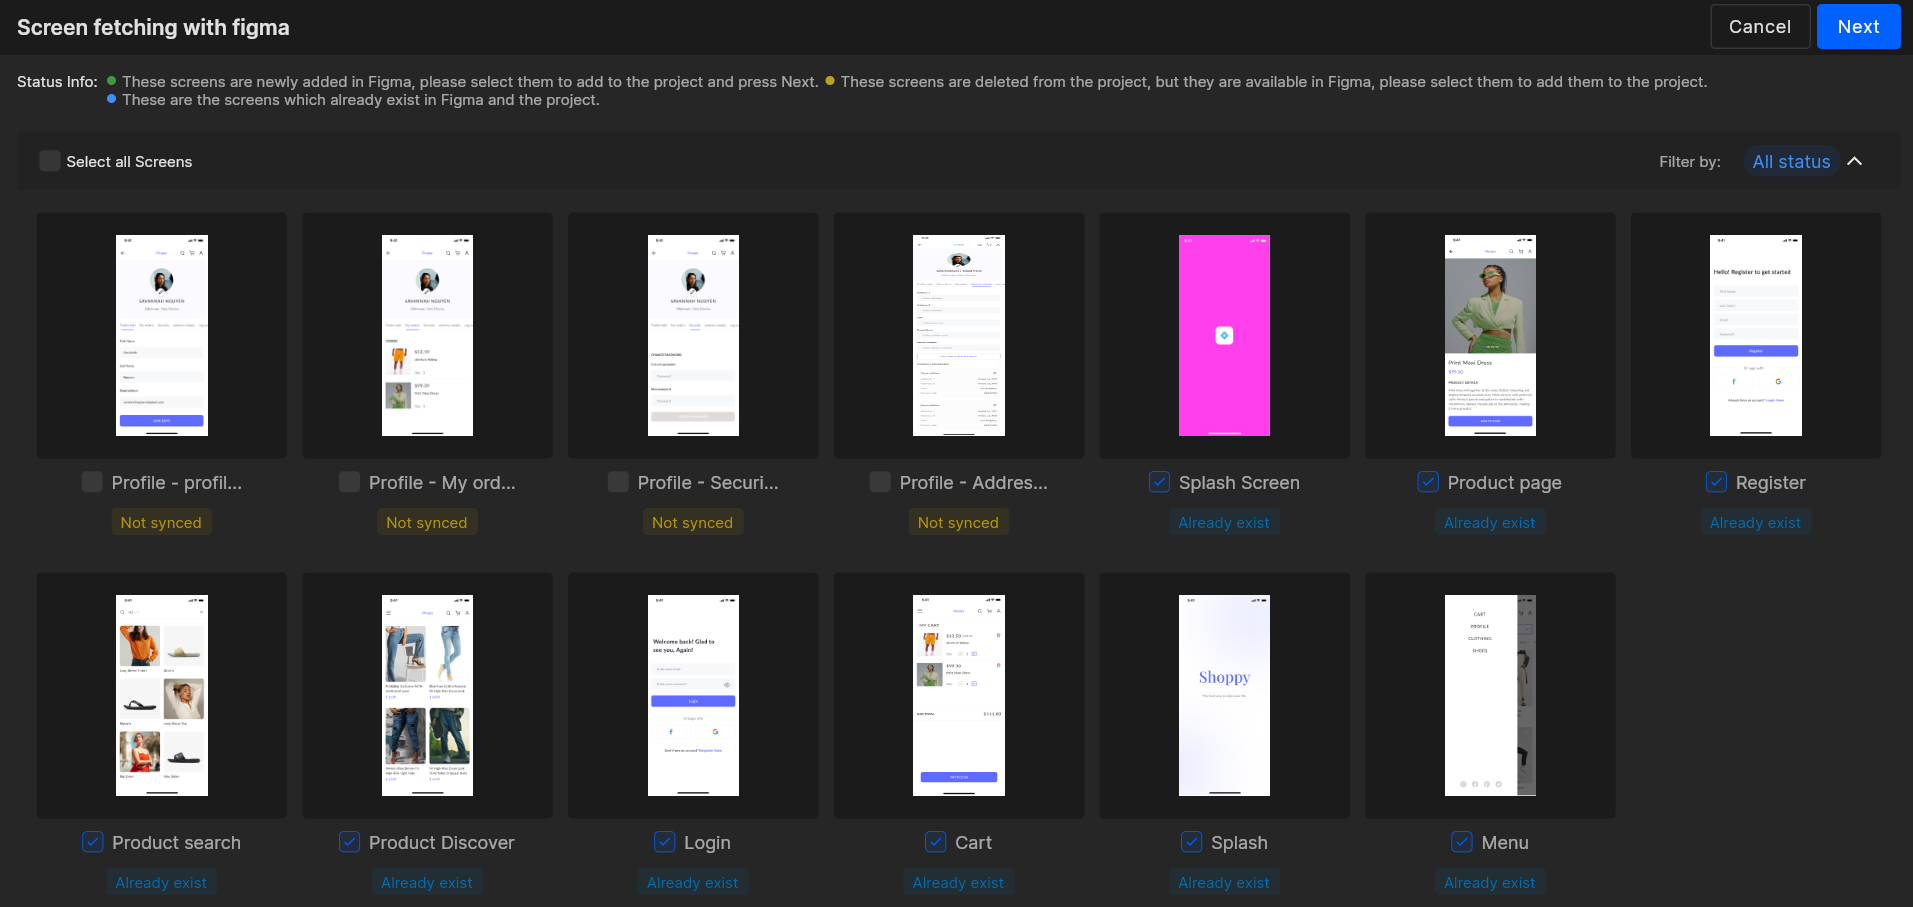
As it start fetching the design changes, it will first show you the screen details. All the new added screens, existing screens and the ones which are removed, are shown here and you can easily add them. Just simply select as your need and click Next to proceed with the screens.
Easy to view Screen Details
Below is the design where you can see the screen details for the Sync design changes option and add new or remove screens from your application.
Step 3:
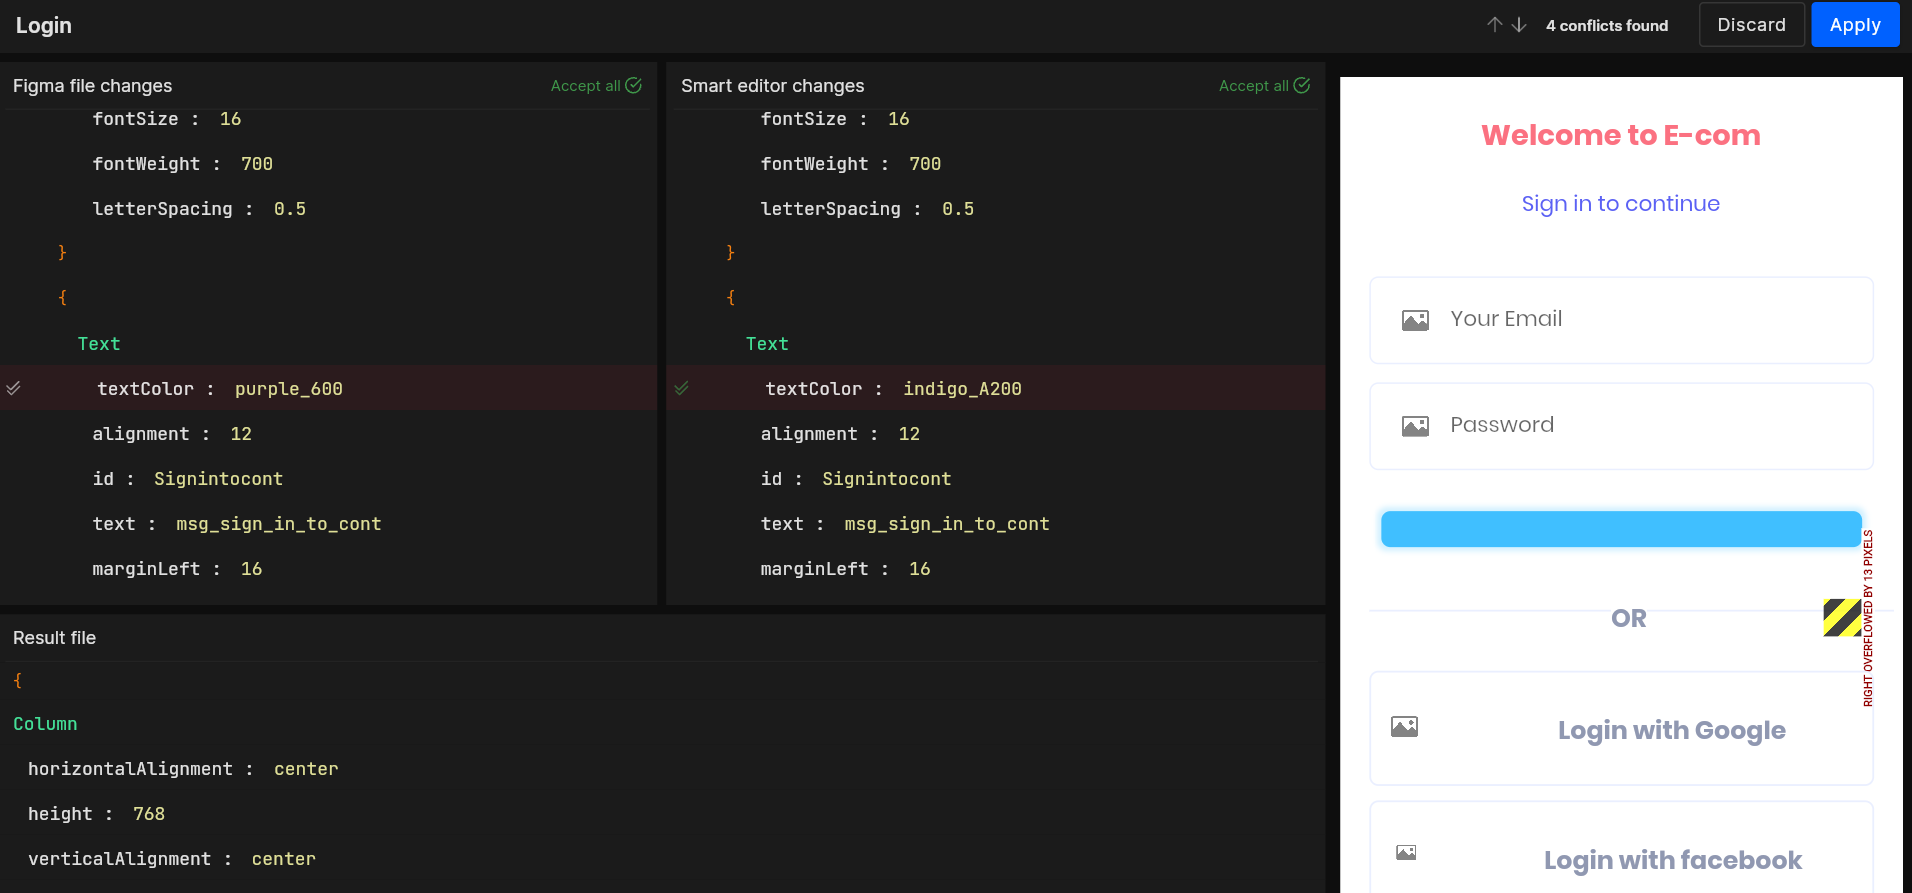
As you click Next, it will start to fetch all your design changes. But if there are some conflicts while fetching the changes, it will show you the conflicts which are needed to be resolved to proceed further.
Resolve Design Conflicts and Live Preview Changes
Here you need to accept the changes which are fetched from the Figma and set the new changes in your app design in DhiWise. As shown below, it will show you both designs as in an IDE from which you need to accept the changes like that in a merge request, and will also let you see the result file after the changes are made in the below area with a live preview of the design on the right.
Live preview of design changes makes it so easier to resolve the changes.
Step 4:
Next, click on Apply and your design changes from the Figma file are fetched in your application.
Save a named version of the design changes in Figma file
Creating a named version of Figma file helps to use the latest design version. This helps in resyncing your design changes properly.
Add a newly named version of your Figma file. Open the Figma menu, and select Save to Version History.
Add a title and description for your new version and summarize your changes.
Example Title: “Splash screen added”
Example Description: “A new version has been added for Splash screen.”
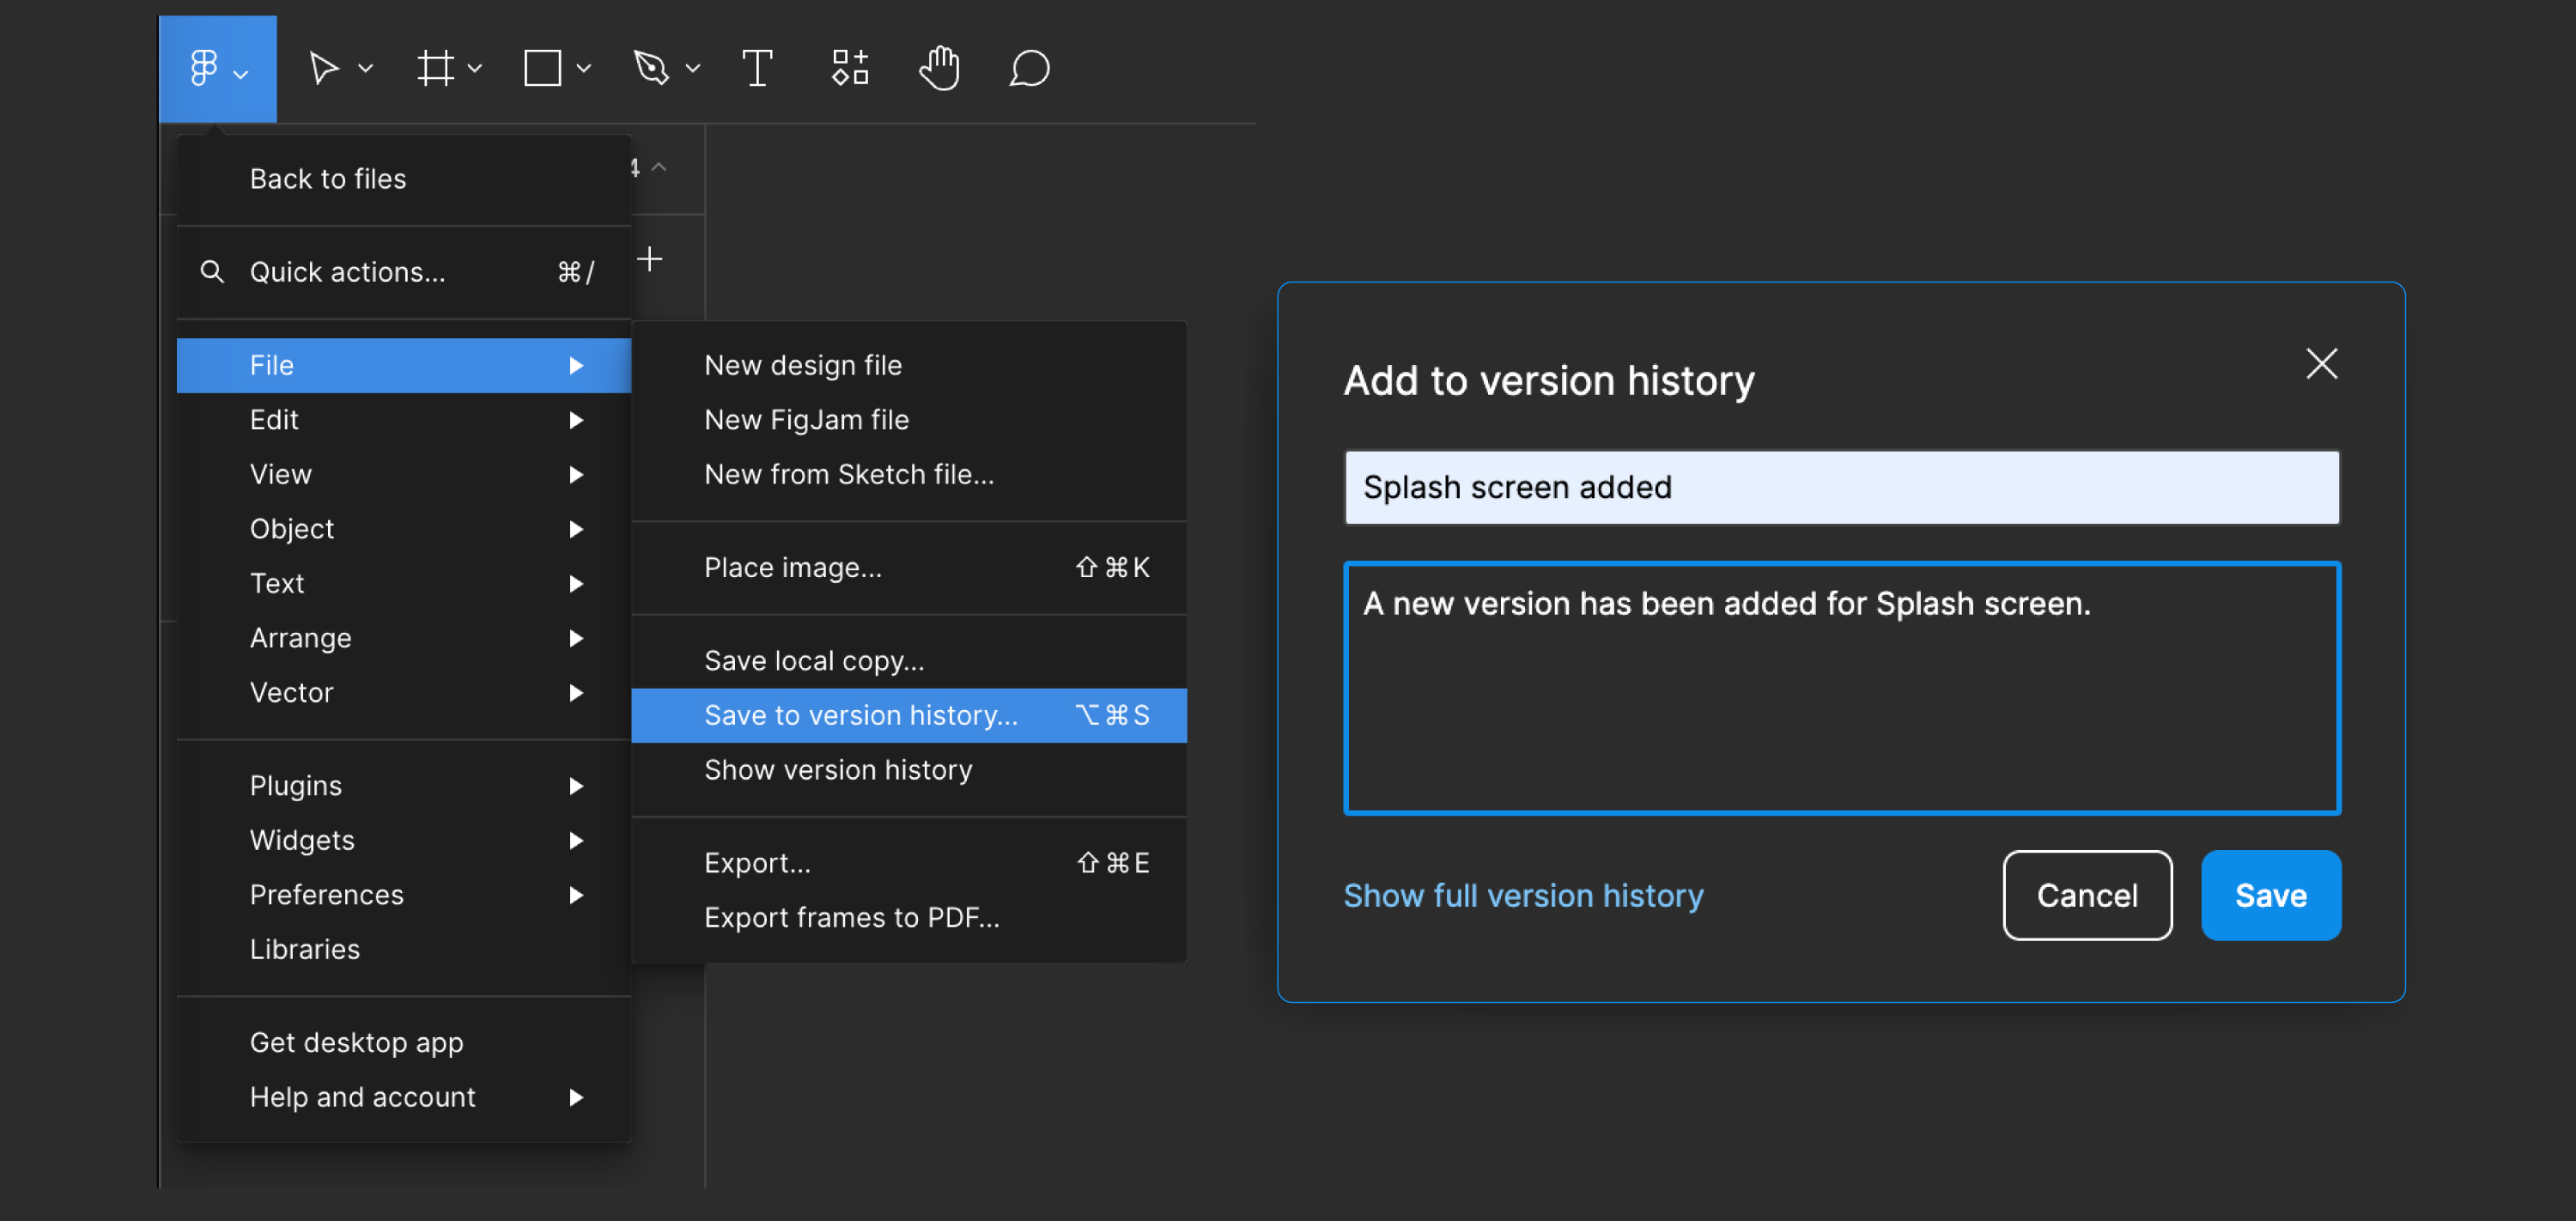
- Click Save to create a new version.
Now, go back to DhiWise and again Sync design. This will bring new changes to your DhiWise application.
Got a question? Ask here